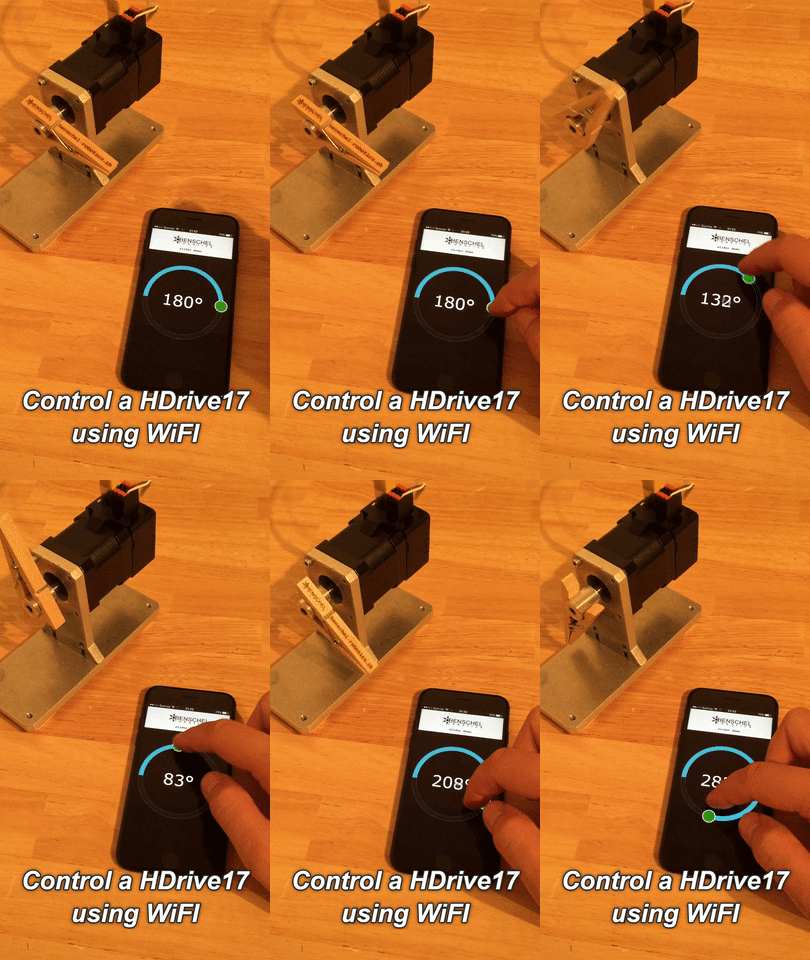
Remote control a HDrive by a mobile phone
Connect the HDrive to your local network by plugging the Ethernet cable from the Motor to your WiFi router. Take care that you have configured a valid IP-Address on the HDrive for your network first.
The whole application shown in the video is contained in one HTML file. This file can be hosted in the HDrive it self or any local web server in your network.
If you want to use your mobile phone to control the HDrive like in the video, you have to publish this web application to your local WiFi network. Both, the HDrive and your phone needs to have access to that network.
On your mobile phone just Navigate in a browser to the Website, hosted on your PC. To host such a site in your network you could use Apache Webserver or IIS from Microsoft, just keep in mind to make some netsh and firewall configuration that your mobile phone has access to the page.
Another way could also be to use Node.js for creating the Webserver or Docker to embed an Apache server – they are many ways :).
It is also possible to store the web page directly on the HDrive servo motor, then no PC is mandatory anymore.
Note: We are using the JS/CSS for the circular slider from here: https://dev.to/madsstoumann/accessible-circular-sliders-11p

Code snipped on how to send control commands to the HDrive Servo Motor:
    var host = "http://192.168.1.102/";
    var targetPositionOld;

    function updateMotor() {

        // Only update position if mendatory
        var targetPosition = document.getElementById("range").value;
        if (targetPosition == targetPositionOld)
            return;

        // Send drive order to HDrvie
        var oReq = new XMLHttpRequest();
        oReq.open("POST", host + "writeTicket.cgi", true);
        oReq.onload = function (oEvent) {
        };

        oReq.send(new Blob(['<control pos=\"' + targetPosition * 10 + '\" speed=\"350\" torque=\"300\" mode=\"129\" acc=\"10000\" decc=\"10000\" />']);

        // set the old target position
        targetPositionOld = targetPosition;
}
The motor receives the drive command from the XML string on line 17. This line is driving the motor towards the circular slider position with a defined speed, max. torque, acceleration and deceleration.
The rest of the code is mainly for the circular slider and has nothing to do with the HDrive.
Upload files to the HDrive
The HDrive is capable to hold a HTML file with a size of 100 KB. This file is stored inside a dedicated section inside the Flash memory of the micro-controller.
To make the HDrive accepting an HTML file, it is mandatory, to rename the file to the ending “.htmlmin”. The intension there, is to use a minifier – but this is not important here because the file weight is only a couple of kilobytes.
Instruction:
First enter the “Fallback” Web GUI from your drive by navigating to http://192.168.1.102/fallback.html
This page is always available, also if the Web-gui would have been deleted.
Click on “Upload Web GUI” to upload your .htmlmin file. This should only take several seconds.
The HDrive is restarting automatically after a successful upload.
The upload process is finished as soon as the drive is ready again (green blinking) .
Accessing the App
After uploading the HTML file you can access the page on the address http://192.168.1.102/ from any device in the same network, your PC is not mandatory anymore, the files are hosted directly from the HDrive. The drive acts a s a small Web-Server now.
Get back to normal HDrive GUI
Navigate again to http://192.168.1.102/fallback.html to upload the normal Web-Gui.
Full HTML Code
A little repository has been created on GitHub to maintain this example. Feel free to download and to modify the script as needed.